While anti-virus and anti-malware software protect your system from the on-running threats, a Firewall prevents any malicious element entering the system in the first place. It is what sits between your system and the outside world, and prevents any external viruses, malware, or other security threats from entering the PC. Furthermore, it can defend any hacking attempts and shy off such attacks instantly. However, for all this to happen safely and reliably, it is important for the user to configure and set Windows Firewall perfectly, and create some additional advanced firewall rules. This article explains how you can access the Windows Firewall properties and create such advanced firewall rules in Windows 8.1.
The foremost solution which is always encouraged is checking your PC primary healthiness and restoring any discrepancy that perhaps is bringing about the disturbance:
- Step 1 : Download Systimizer – PC Cleaner Tool (Compatible with Windows 10, 8, 7 & XP)
- Step 2 : Click “Scan” to find Windows issues
- Step 3 : Click “Fix” to eliminate all troubles
Accessing Windows Firewall Settings
Windows Firewall can be opened via the following steps:
- Open Run by hitting Windows + R
- Type control panel and hit Enter. This will open the Control Panel box
- Navigate to System and Security and then to Windows Firewall
- Locate and click Advanced settings located at the left pane. This will open the Windows Firewall with Advanced Security
Windows Firewall with Advanced Security
There are three profiles that are created and used by the Windows Profile, namely:
- Domain Profile: Activated when the PC is connected to a domain
- Private Profile: Activated when the PC is connected to a private network, including work or home network
- Public Profile: Activated when the PC is connected to a public network. This can include connecting to a public Wi-Fi network or to the internet directly.
Based on the network determined and assigned by the user when he first connects to it, Windows Firewall switches to and uses the appropriate profile.
How to create an Advanced Rule
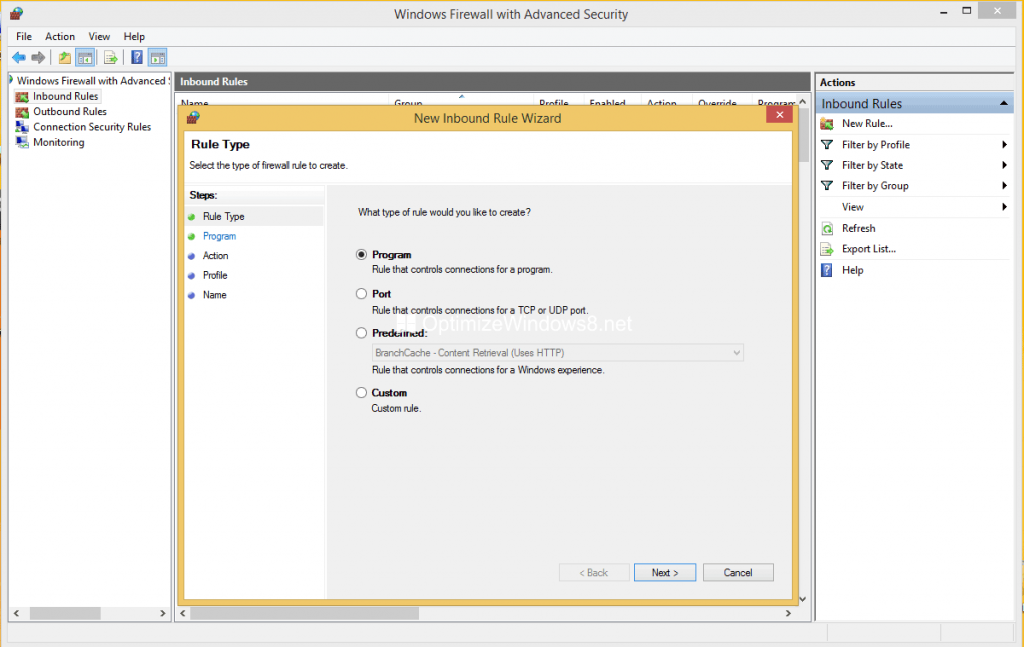
Notice the links Inbound Rules and Outbound Rules at the left pane. Select the link for which you want to create the rule and then click New Rule located at the right pane.
On the Rule Wizard windows that is opened, notice that Windows Firewall has four types of rules:
- Program – This rule is used to manage entry and exit of programs
- Port – This rule is used to manage port, port range and protocol
- Predefined – consists of rules predefined and in-built in Windows
- Custom – create your own combination of program, port, and IP address to allow or block
Suppose you want to block a certain Program and deny its communication with the internet. The steps below demonstrate how this will be done:
- Select the Program rule and click Next
- Enter the path name of the program, or use the Browse tool. Click Next when done
- Make sure you are in the Action screen and then enable Block the connection
- Enter the Profile screen and choose for which profile do you wish to apply these conditions
- Enter the Name screen and type a name for your rule. You can also enter a small description regarding the rule, but this is optional and may be left alone
- Click Finish to finish creating a rule. The rule will take immediate effect
With such drastic increase in threats posed by the internet, knowing and understanding Windows Firewall has become imperative. Read this article carefully and make sure you control your incoming and outgoing data correctly.

